We see every mistake in the book when it comes to tubeless setups and most involve the taping of the rim and installation of the tire itself. Here are the most common setup mistakes or misconceptions that lead to larger issues or a bad experience.
- - Tape Your Rim Like A Pro -
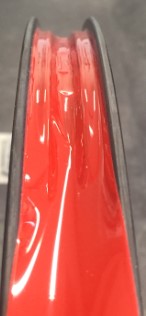
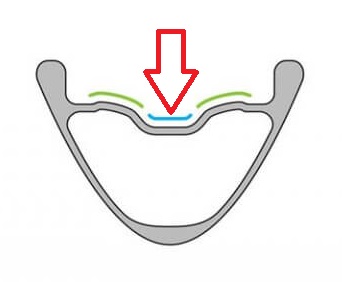
You must make sure the rim surface is clean. We recommend wiping it down with isopropyl alcohol to ensure proper adhesion of the tape. When starting the tape be sure to start 1-2 spoke holes before the valve stem hole and end 1-2 spoke holes past the valve stem hole. Make sure the tape fully contacts the rim, do not leave a gap between the tape and the centermost part of the rim. If there are wrinkles or places where the tape hasn’t adhered, this will likely result in larger issues later. Similarly, making sure the tape is evenly applied across the rim channel, with just a few millimeters extending up onto the sidewalls of the channel will ensure a proper seal throughout. Finally, insert the valve through the tape should be done carefully to make sure the tape doesn’t tear out from the valve hole. Using a small pick to create an initial hole helps, and is the best practice. Taping is the first step, and the most critical in the tubeless setup - be sure to take your time, and do so carefully.
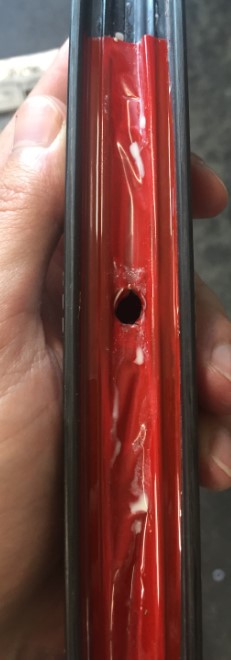 < Bad example vs Good example >
2. - Tire Installation -
Tubeless tires have revolutionized and changed the bike industry for the better. While mountain bikers discovered this and adopted the technology quickly, the road bikers have been slow. Similarly, product offerings for road tubeless tires and wheels have been sparse till recently. Tubes have reigned supreme and trained the way many mechanics have gone about installing tires and tubes. Tubeless tire installation, however, requires different and new techniques that can make even the most experienced mechanic struggle. This isn’t due to poor products, but rather poor education about why tubeless tires must be installed differently. A tubeless rim channel has two shoulders that must be prominent to maintain a constant seal around both sides of the rim channel. Starting the tire installation opposite the valve is the first step to make the entire process much easier on yourself. Similarly, making sure to keep both beads off those shoulders, and inside the center channel of the rim will also make the entire process a lot less of a headache. Avoiding either one of those small tips will make the tire installation feel utterly impossible.
- - Inflation -
When setting up tubeless it is critical to get as much air into the tire as quickly as possible. If you have ever seen a car tire being installed and seated onto a rim, it is a similar concept to a bicycle tubeless setup. To seat the tire onto the rim you need a burst of air that will help the tire over the bead lock in the rim channel. Most people use an air compressor, high volume floor pump, and in some cases a CO2 cartridge. If you are struggling to get the tire seated try removing the Presta valve core to allow for more airflow, reinserting the valve core when the tire is seated. Once you have the valve core inserted, inflate the tire and check for leaks. Most properly set up wheels will hold air for a few minutes to a few hours without sealant so this is a great place to check your setup before adding sealant.
- - Air Leaking at the Valve Stem -
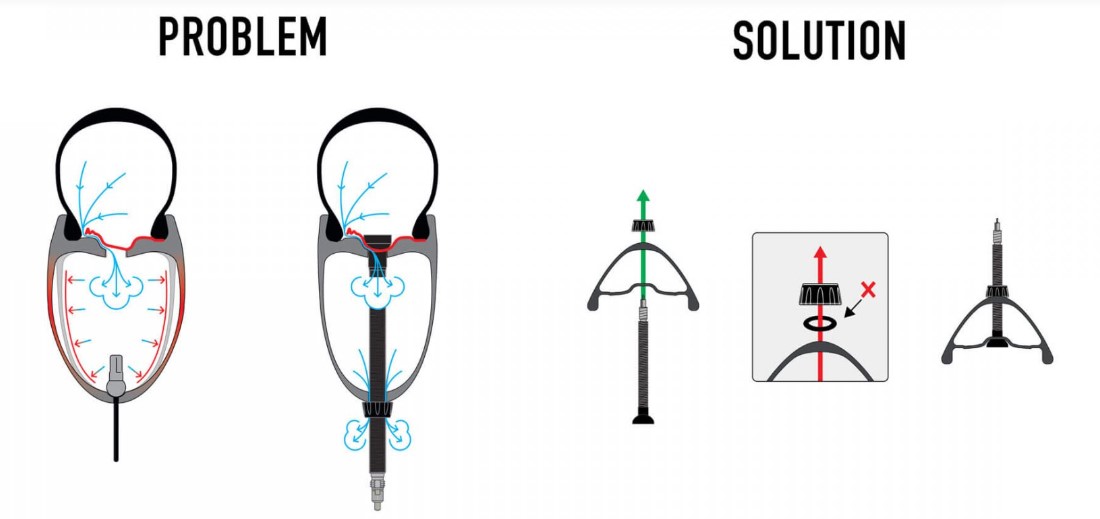
If your taping job is compromised in any way and the air is leaking into the rim cavity, it will typically expel or be heard through the valve stem hole. This is because the valve stem isn’t sealed as tightly as a spoke hole so this is the only place for the air to escape. If you hear air purging through the valve stem, make sure the valve stem is seated correctly, but never tighten with pliers, finger tight will do. If you confirm the valve stem is installed correctly and the air is still leaking. You have a breach in your tape. If you continue to attempt inflation, you run the risk of expelling sealant into the rim cavity, sealing your valve stem hole w/ sealant, and inflating the entire rim cavity which will either immediately or eventually blow the sidewall off your rim. So, if you ever hear air or see sealant coming out of the rim at the valve stem hole. Stop, remove the tire, and inspect your tape job. ENVE makes a Pressure Relief Valve Stem Nut that is designed to eliminate the possibility of inflating a rim cavity as a measure of extra insurance for tubeless setups.
- - Tubeless sealant -
If you have verified that your tires retain air go ahead and let all the air out, remove the valve core, and insert the required amount of sealant. Typically holding the valve stem at the 5 or 7 o'clock position allows the sealant to be installed without sealant burping back out of the valve stem. When the sealant is installed, inflate the tire, hold the wheel vertical and start shaking your wheel forward and back while holding your hands in the 10 and 2 o'clock position. Slowly rotate the wheel while shaking forward and back. Repeat as needed. While doing this listen for any leaks and make sure to spend enough time shaking the sealant in the area of the leak. The sealant will be the key to sealing up any micro imperfections where the air will slip past.
- - Ride Your Bike -
Pretty self-explanatory here, the best thing to do after you set up your sealant is to go on a bike ride. This ride doesn't need to be a massive one, just long enough to allow the sealant to continue to find any imperfections that happen while riding. Usually around the block will work but sometimes you need a legit first ride.
- - Flat Tire, Now What?
Although it’s rare - flat tires while running tubeless can happen. Flatting or puncturing a tire while setup tubeless isn’t the end of the world or even the end of your ride.
Sealant Fix -
- One of the benefits of tubeless is the ability of the liquid latex within the tire to find a hole, and plug it completely. Often, you’ll see sealant coming out of the hole or puncture in the tire. Rotating that hole downwards will allow more sealant down towards the puncture, and help seal it faster. Sometimes, the hole will seal instantly, and almost no air pressure will be lost. If the seal does take a bit more time to seal, it’s wise to pull out your pump or inflation tool to refill the tire with any lost pressure.
- Tires that have been sealed in this fashion are often still OK to keep riding for the remainder of the tire’s life. Liquid latex does a tremendous job of keeping a tire sealed long after initially filling the puncture hole.
- This is the most common type of fix and should be your first resort before trying different methods.
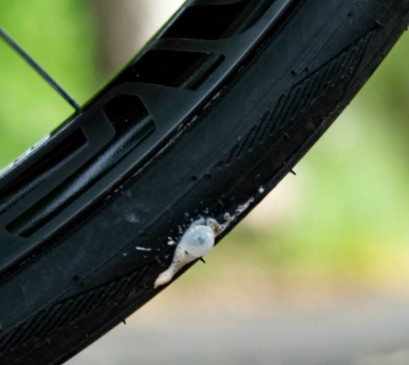
Plug Fix
- If the hole in your tire is larger than what the sealant or liquid latex will fill, often a plug or “Bacon Strip” will work just as effectively. The plugs are inserted directly into the hole in the tire. These small rubber pieces quickly attach themselves to the sealant within the tire to seal the tire. Very similar to the ATV, Motorcycle, and even Automotive industry, these plugs work quickly and effectively. Similarly, it’s best to pull out your pump or inflation tool to refill the tire with any lost pressure.
- Tires repaired using plugs will more often than not, continue to perform for the remaining life of the tire. The combination of liquid latex and a plug will continue to keep a tire sealed long after initially plugging the puncture hole.
- This type of fix is more common to gravel and mountain bike tires and should be your second resort after trying to use the sealant within the tire to fill the hole, but before resorting to installing a tube. Due to the higher tire pressure of the road tubeless plugs aren’t typically as effective as they are for gravel and mountain bike tires.
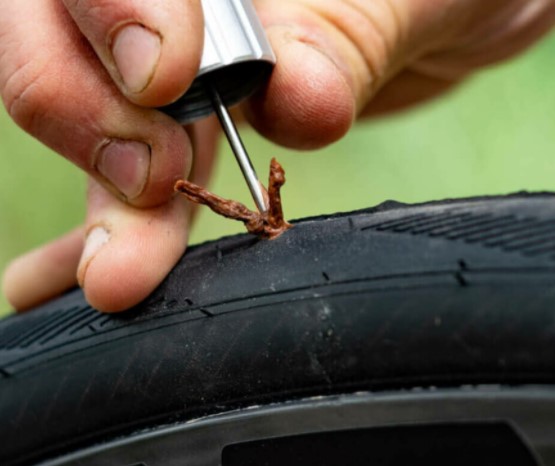
Tube Fix -
- Sometimes, no amount of sealant or plugs can stop a tire from losing air. The odd piece of glass or nail in the road can create a hole and puncture in the tire that exceeds the amount of sealing power of liquid latex or plugs. Not to worry, however, as putting in a tube on a tubeless setup wheel and tire is nearly identical in process to the old-fashioned way of repairing a flat that might have occurred on an older style non-tubeless tire and rim.
- First - push each tire bead on each side into the center trough of the rim. This first step will make every following step dramatically easier, as tubeless wheels have higher tolerances for maintaining a tubeless seal on the rim than a standard hook-style clincher.
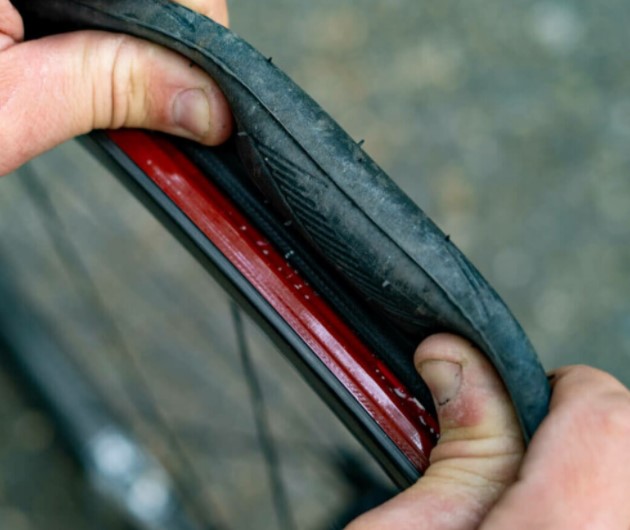
- Next - you’ll need to remove the valve from the rim. Start by un-threading the valve nut on the spoke-side or spoke-face of the rim. Remove the valve, but note that this valve is still usable for future tubeless setups, and should not be discarded.
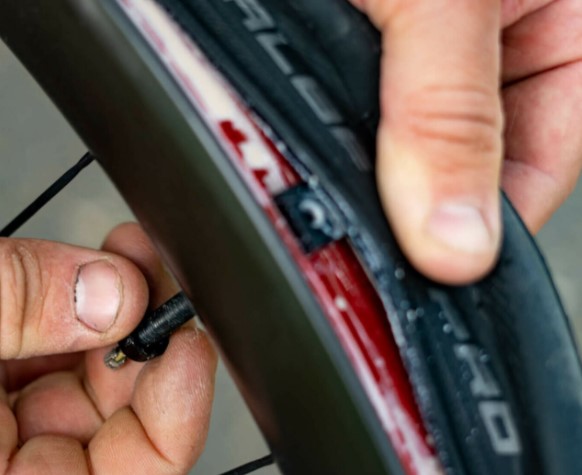
- Pull one side of the tire bead over and off the rim, while keeping the other bead inside the center trough. Be sure to identify what caused the flat and remove it before inserting the new tube into the tire. Use a rag or sleeve to feel the inside of the tire for the cause of the flat. Using your hand will likely cause injury - especially if the flat was caused by glass or a rusty nail.
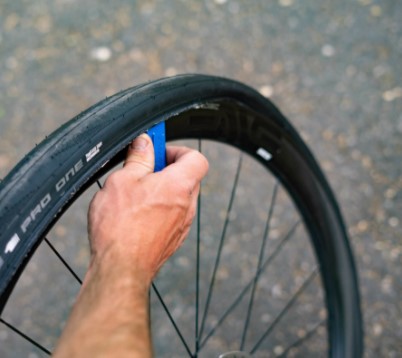
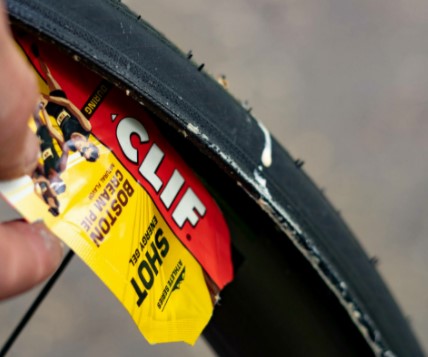
- If the hole is large enough, it is wise to use some sort of tire boot that will help support the tire from the tube protruding through too large of a hole. Often, a dollar bill or used gel packet will work well as a tire patch.
- Give the tube some shape by blowing into the tube. Insert the valve of the tube into the valve hole, and install the tube into the tire. Pull the bead of the tire back over the rim wall, and start opposite of the valve. Starting in this position, and keeping the tire beads in the very center trough of the rim channel will make tire reinstall dramatically easier. Be sure to finish right at the valve. While this may be the opposite of what you’ve done in the past, it works to allow more room for the tire to slide over the rim sidewall and into the rim channel. Creating more space is critical on tubeless tires that have stiffer beads than traditional non-tubeless tires.
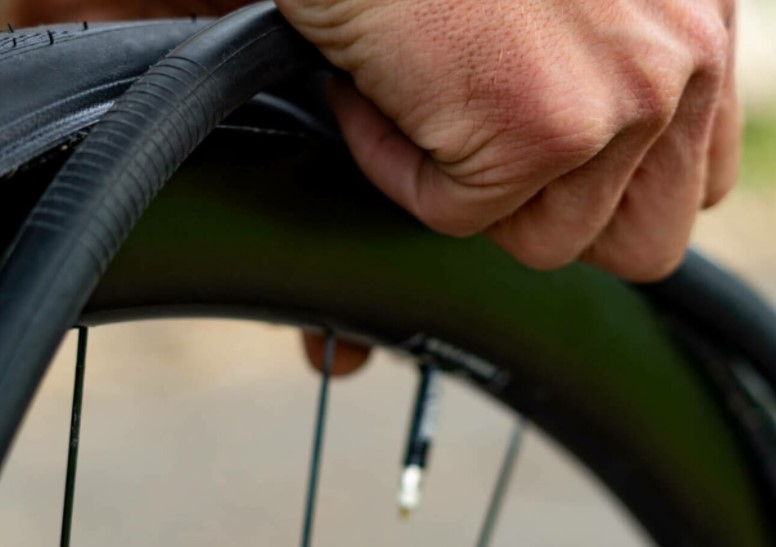
- Finish by checking that all of the tire is inside the rim channel, and not pinching or overlapping the tube. Once the final inspection is finished, inflation is the final step. Pump up the tube, and get back to your ride.
Tubeless on any wheel application provides a host of performance benefits. They can still flat, however, and as we’ve pointed out above - these punctures can be fixed on the road or trailside quickly and easily to keep you riding.
For any more questions, feel free to reach out to us via the link below or call at 1-877-358-2869